Author’s Note 2022-11-17 – I originally wrote this article January 21, 2020 and posted it in an image album on Imgur. I’m attempting to consolidate and duplicate my posts and content here, on my own site. I have updated the content and pictures where necessary to eliminate embarrassing mistakes and typos.
Author’s Note 2023-06-21 – Fixed some additional embarrassing mistakes, fixed some broken links, and did some editing to generally make me not seem like a rambling lunatic. Enjoy!
Introduction
So what’s this all about?
BeOS: the Mac OS X might-have-been.
Power Macintosh 8600 – the less capable 9600.

So a while ago I decided I wanted to try out as many ‘obscure’ operating systems as I could. Part of this was simple curiosity – what kinds of modern operating systems were created which weren’t derivatives of DOS, Windows, Linux, MacOS, or UNIX? There was also the technical challenge of getting whatever I found, running, and ideally on their original native hardware. A project that was part software, part hardware. A perfect blend.
For the purposes of this project, a modern operating system is something with a GUI and some kind of Internet capability. And if we throw in ‘obscure’, then that eliminates the usual Windows, MacOS, and Linux. More than likely we’re talking something made in the mid-to-late 90’s.
And those mid-to-late 90’s were an absolutely fascinating era of computing. A lot of the ideas for modern Internet-enable systems were still in their infancy, and collectively we were still trying to figure out what the future would be. Would we use TCP? Would we use IPX? Would we use ISDN or T1 or ADSL? Would Linux take over the server room, or stay a hobbyist operating system? Would Microsoft be broken up with the DoJ antitrust investigation? Would Sun take over the business world with their workstations? Would Apple finally go bankrupt and be sold off to the highest bidder? Was the so-called ‘Information Superhighway’ a flash-in-the-pan that would never catch on? What about processors? Surely the venerable Intel x86 processor would reach the limits Moore’s Law and we would all be running a MIPS or PowerPC processor! What a time to be alive!
In hindsight, many of these theories and products were wishful thinking, victims of circumstance, corporate missteps and blunders, or completely blown away by technological leaps forward. Who could have guessed the ubiquity of the Internet, the pervasiveness of the Intel x86 architecture, the meteoric rise of mobile computing. The acquisitions, mergers, and bankruptcies. The dot-com boom and bust. What all of these left, however, is a portfolio ripe for modern day exploration.
So for the purposes of this project, the big names were out. Windows is too mainstream. MacOS has been done to death and is relatively easy. Old Linux versions aren’t much fun, or are borderline impossible to find. But that didn’t mean that there weren’t other contenders in the arena.
UNIX was a big one, and there were a lot of ‘weird’ versions of UNIX available. AIX, HP-UX, Solaris, Xenix, etc. A lot of those require specific hardware, licenses, or both. Some are just variations on a theme – for example AIX and HP-UX are similar enough in that they are still (somewhat, in the case of HP-UX) updated and are integrating more and more ‘Linux-like’ items every day. Some, like Xenix, are so out of date that they are like stepping back in time, rather than a ‘what-might-have-been’.
OS/2 was another choice. Not a bad OS in its own right, and with a long legacy. Internet capable, GUI, easy to obtain, easy to get running, etc. However, I had done OS/2 before. (Author’s Note – I have a picture series of running OS/2 Warp on a ThinkPad T23 which I hope to upload here in the future.)
Once you cut out the major players, you really start getting into the weird stuff. Like Plan9, RISC/OS, AmigaOS, Netware, Inferno, and of course, BeOS.
Introducing BeOS
I personally heard about BeOS back in the late 90’s and early 2000’s. At that time, it was already available for the Intel platform, and could be installed as a separate program onto Windows. You would double-click the BeOS icon, it would shut down Windows, and then boot BeOS. Restart the system, and you boot back into Windows. I played around with it back then, and even used it as my primary OS in college for about a week, but ultimately it had one fatal flaw that causes most systems to not hit mainstream – lack of software. No universally sought-after critical applications. No game publishers. They were never able to attract enough software, or frankly enough mainstream software, to the platform to get critical mass to compete.
BeOS was a kind of darling child of the late 90’s. It was fast, elegant, and above all else – not tied to a greedy corporation. That was kind of a big deal in those days.
Here’s an interesting blurb from the BeOS Wikipedia article:
“…BeOS is an operating system for personal computers first developed by Be Inc. in 1991. It was first written to run on BeBox hardware. BeOS was built for digital media work and was written to take advantage of modern hardware facilities such as symmetric multiprocessing by utilizing modular I/O bandwidth, pervasive multi-threading, preemptive multitasking and a 64-bit journaling file system known as BFS. The BeOS GUI was developed on the principles of clarity and a clean, uncluttered design.
BeOS was positioned as a multimedia platform which could be used by a substantial population of desktop users and a competitor to Classic Mac OS and Microsoft Windows. However, it was ultimately unable to achieve a significant market share and proved commercially nonviable for Be Inc. The company was acquired by Palm Inc. and today BeOS is mainly used and developed by a small population of enthusiasts.
The open-source OS Haiku, a complete re-implementation of BeOS, is designed to start up where BeOS left off. Alpha 4 of Haiku was released in November 2012.”
https://en.wikipedia.org/wiki/BeOS
To me, BeOS sounded perfect for this project.
Now that I had an OS chosen, what to run it on? Well running it on an Intel system would be, frankly, too easy. BeOS had a PowerPC build for most of its life, supporting the PEeP system, the specific Be-designed desktop computer the BeBox, and certain PowerPC based Macintosh systems. The PowerPC and BeBox versions were dropped late in BeOS’s life when development was consolidated onto the x86 platform.
Only a few select PowerPC Macintosh systems can run BeOS. The website LowEndMac has some details here. Apparently the rule of thumb is that if your Mac is upgrade-able to a G3 through its processor card or L2 slot, it’s probably compatible with BeOS. That being said, BeOS doesn’t support Macs that shipped with a G3 or G4 processor.
These are the only 8 models that are compatible with BeOS. They all have a PCI bus and a PowerPC 603/603e or 604/604e CPU.
- Power Mac 8600 and 9600
- Power Mac 9600 MP
- Power Mac 8500 and 9500, including 9500 MP
- Power Mac 7300 and 7600
- Power Mac 4400 (7220 in some markets)
- Performa/Power Mac 6400
There are some more exotic systems that are also supported, like the 3rd party Power Computing and DayStar systems, but they are even harder to obtain than a regular Power Macintosh these days, so we won’t focus on them.
Enter the Power Macintosh 8600
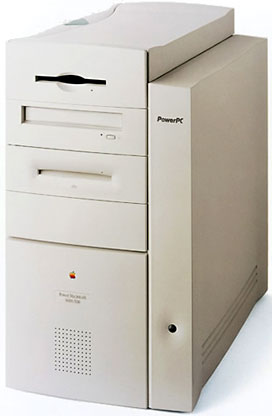
So after digging through my collection of old Macs, I found my old 8600. Ahh the 8600. Released in 1997, it definitely is a product of the mid-90’s. Just look at that glorious beige. It’s kind of handsome in a brutalist, Soviet Block Housing, industrial kind of way. Considering people thought this style was really something when it came out, it says a lot of how boring the generic x86 desktop computer scene was in those days. It really is no wonder people were blown away by Next’s black cases and the colorful iMac.
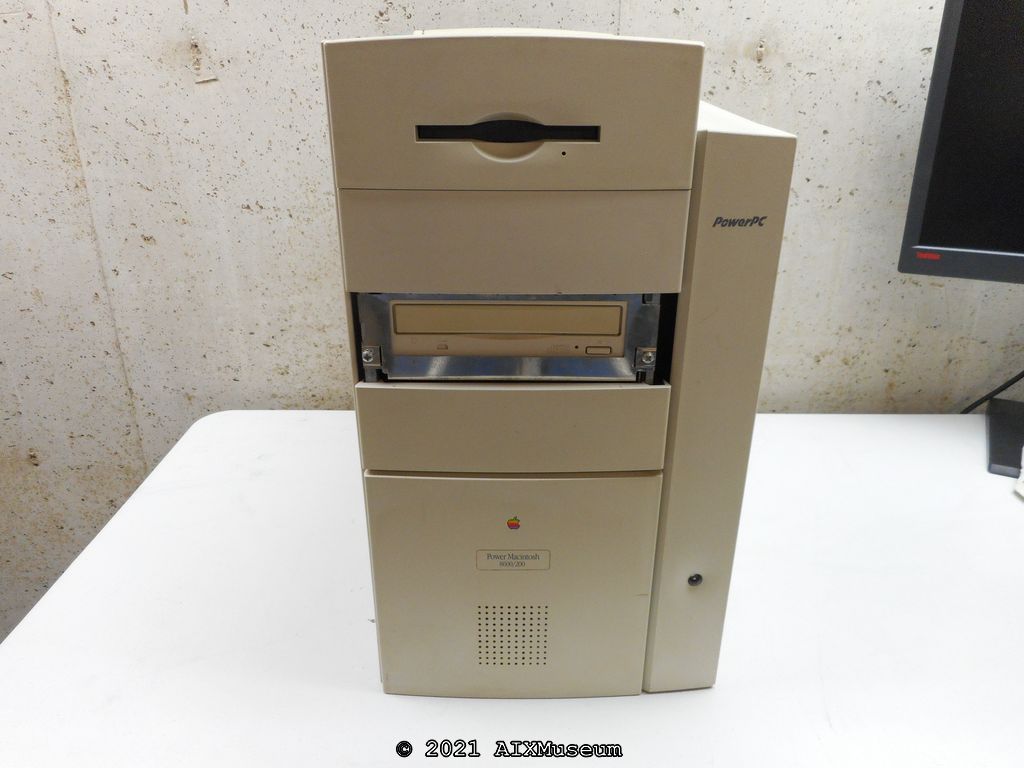
Here’s the front of my 8600. Missing the bezel around the CD-ROM, but otherwise in pretty good shape. Kind of yellowed and dirty from age though. There’s a 1.44MB floppy drive in the top bay and a generic CD-ROM drive below.
LowEndMac has this to say about the 8600:
Although it uses the same cleverly designed case as the Power Mac 9600, the 8600 was a less costly, less expandable machine. It has 8 DIMM sockets for memory, four less than the 9600, and three PCI slots, down from six in the 9600.
The 250 and 300 MHz versions sometimes had an extra powerful 560W power supply (vs. 390W on the regular 8600) to drive the power hungry 250 and 300 MHz 604e processors. These models also has a 1 MB L2 cache, 64 MB of RAM, and 8 MB of video memory.
The 8600 was part of the last generation of Macs to ship with a SCSI hard drive as a standard feature.
EveryMac has a QuickTime VR movie that shows the easy access and intelligent design of the 8600/9600 case.
Both the 8600 and 9600 were essentially replaced by the beige Power Mac G3 in November 1997.
http://lowendmac.com/1997/power-mac-8600/
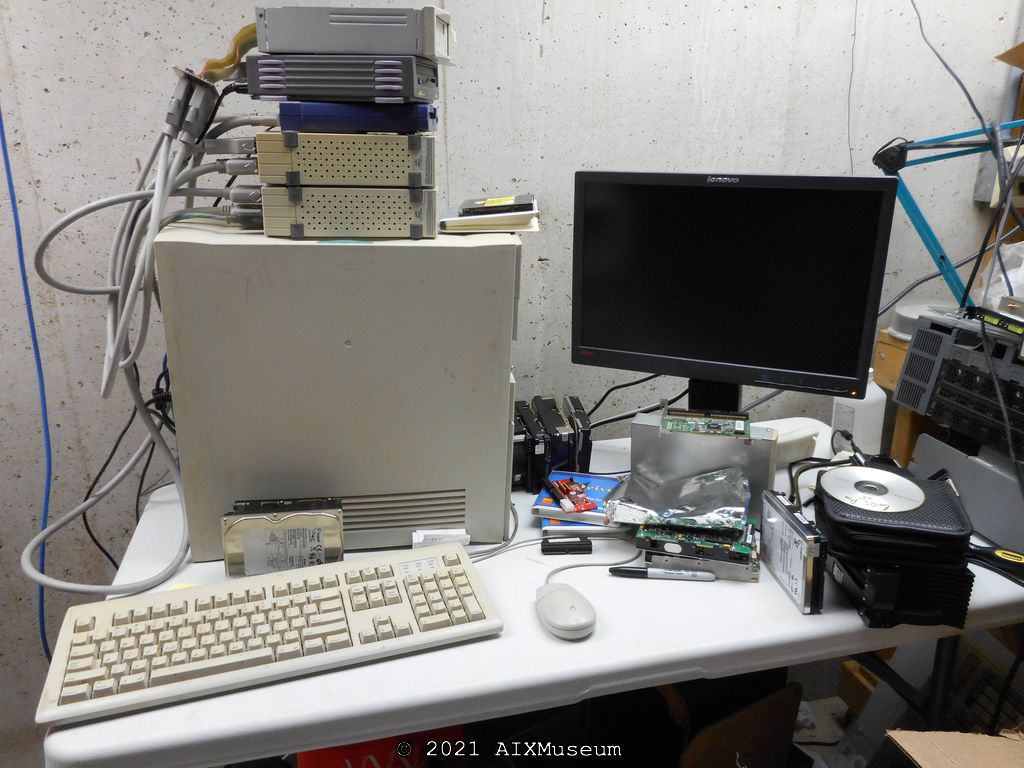
The Before Picture. Egad.
Here you can see the utter mess that my work table became while I was still trying to get this project underway. Almost nothing you see in this picture was actually needed in the end, other than the monitor, the 8600, the keyboard, and the mouse.
I had (from top to bottom) a 20GB DDS tape drive, a Syquest drive, an Iomega Zip drive, a 9GB external ADS drive, and a second 18GB ADS drive. Also pictured are no less than 7 internal SCSI disks, a SCSI2SD adapter, a replacement CDROM and a binder full of MacOS CDs.
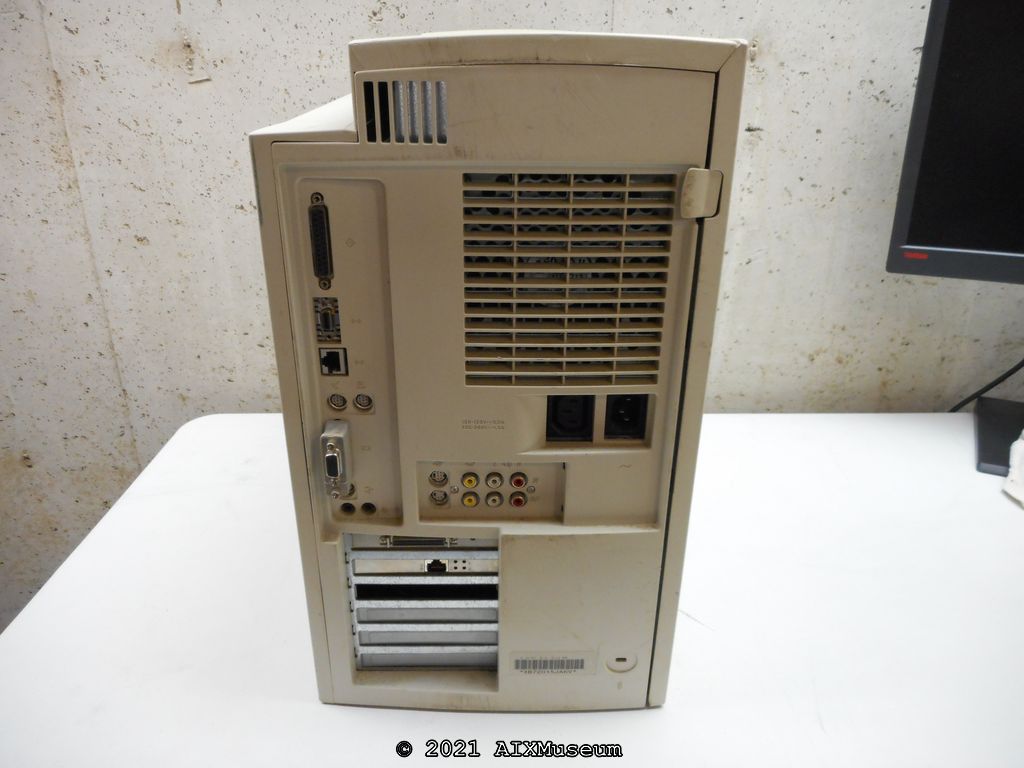
Here’s the rear of the system. There’s the usual compliment of common Macintosh connectors. This particular 8600 has the optional AV in/out connectors, which were fun back in the day. I’m unsure if those were standard, or were an extra option, like many of the Macs from this era. They came with this system when I got it surplus years ago. I also have a Macintosh to VGA adapter connected.
In the 90’s and early 2000’s, it was common to add aftermarket video, networking, and SCSI adapters to either boost performance, or improve connectivity. The network card allowed for 10/100 connectivity, which was great at the time, and the SCSI adapter allowed me to connect faster SCSI devices. This particular system had, I believe at one time, all three, but the video card is lost to time now, unfortunately. Only the SCSI and Ethernet PCI cards remain, although neither were used for this project. And I really ought to find a blank for the empty slot. Or find a video card. Either/or.
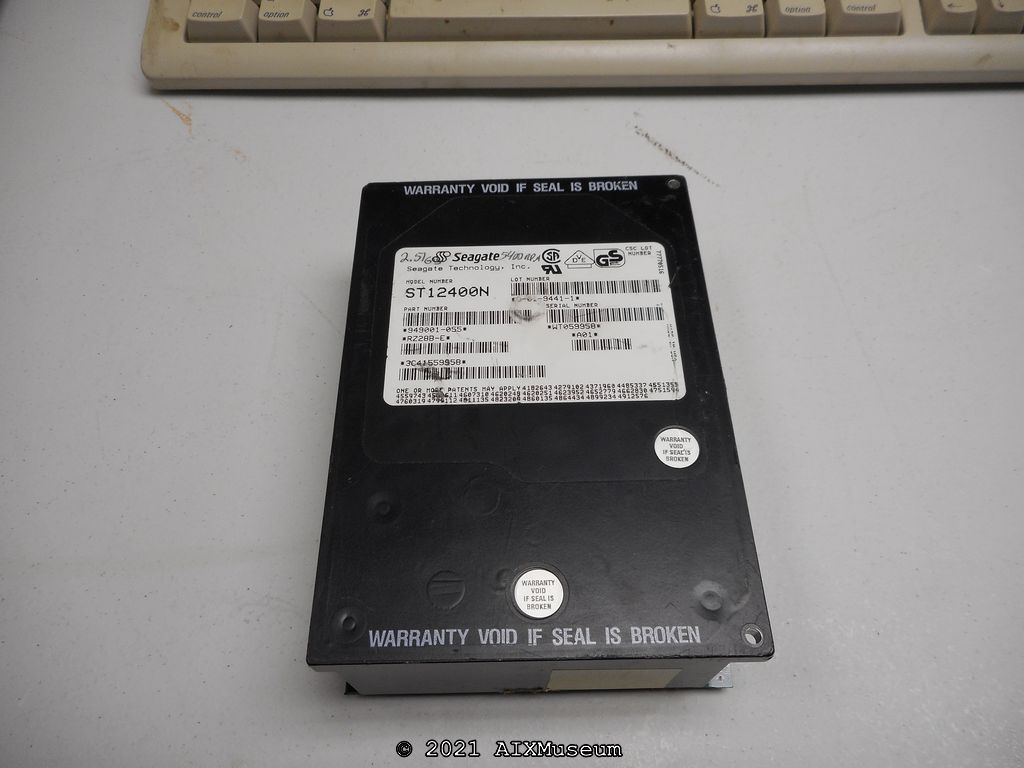
First things first, I knew the ‘ol 8600 didn’t have a hard drive. So after digging around the shop, I found this 2GB 50-pin SCSI disk, which will work for our purposes.
It’s a Seagate ST12400N. 2.5GB. 5400RPM. 50-pin SCSI. I suspect it is a 1994 vintage. Since the 8600 is 1997 vintage, this drive is a bit old for it, but it will get the job done.
Amazingly enough Seagate still has its product spec sheet available here: http://www.seagate.com/support/disc/manuals/scsi/67450e.pdf
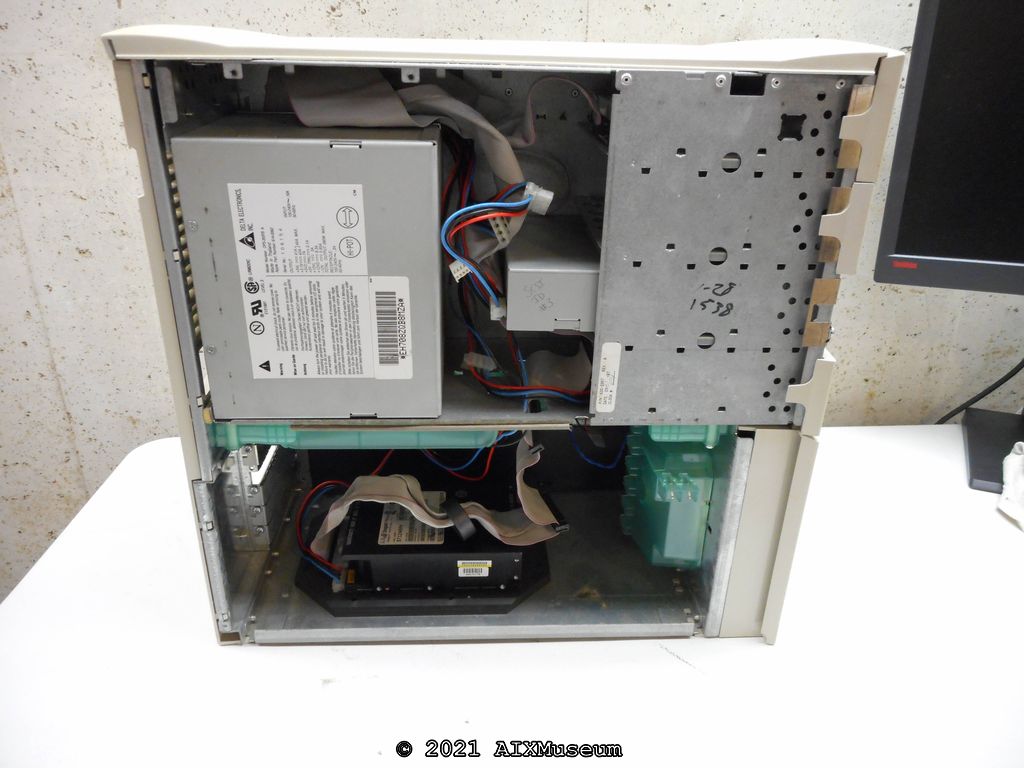
Inside the project machine. Here you can see it fitted with the hard drive, but not fastened down. Kind of a rats nest of wiring. You can sort of see the two green plastic catches to split the case, the green handle, and the green fan connector on the left.
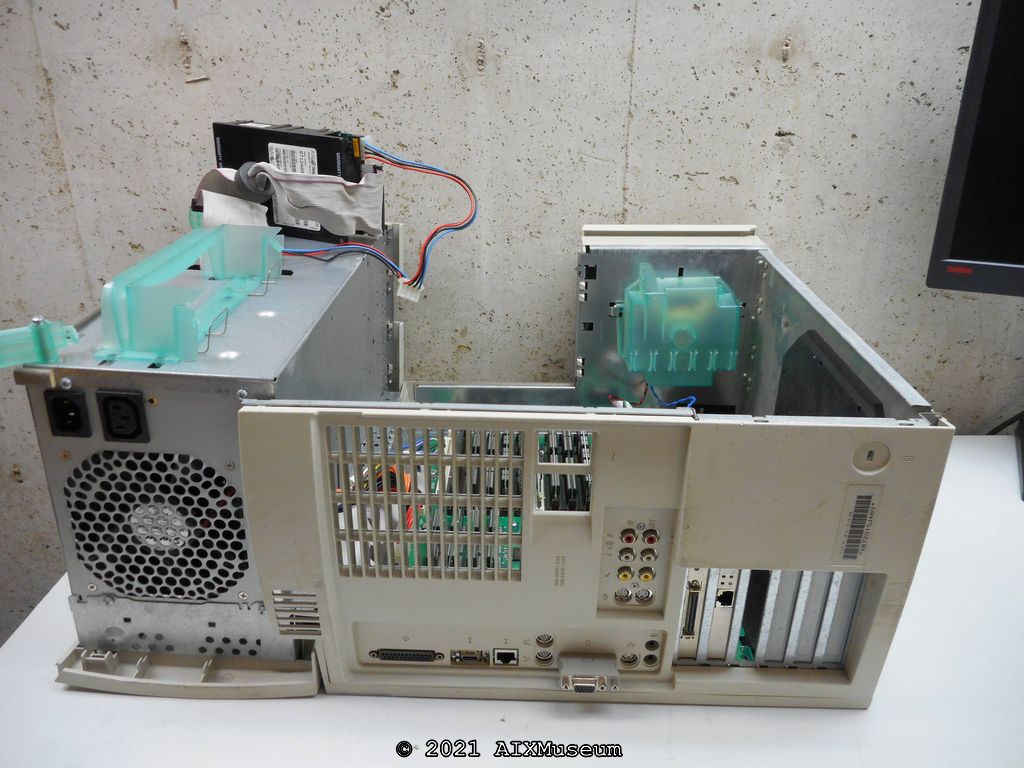
Here’s the system open. You can see one of the design flaws of the setup, in that a hard drive mounted to the bottom of the system must either be disconnected or go along for the ride.
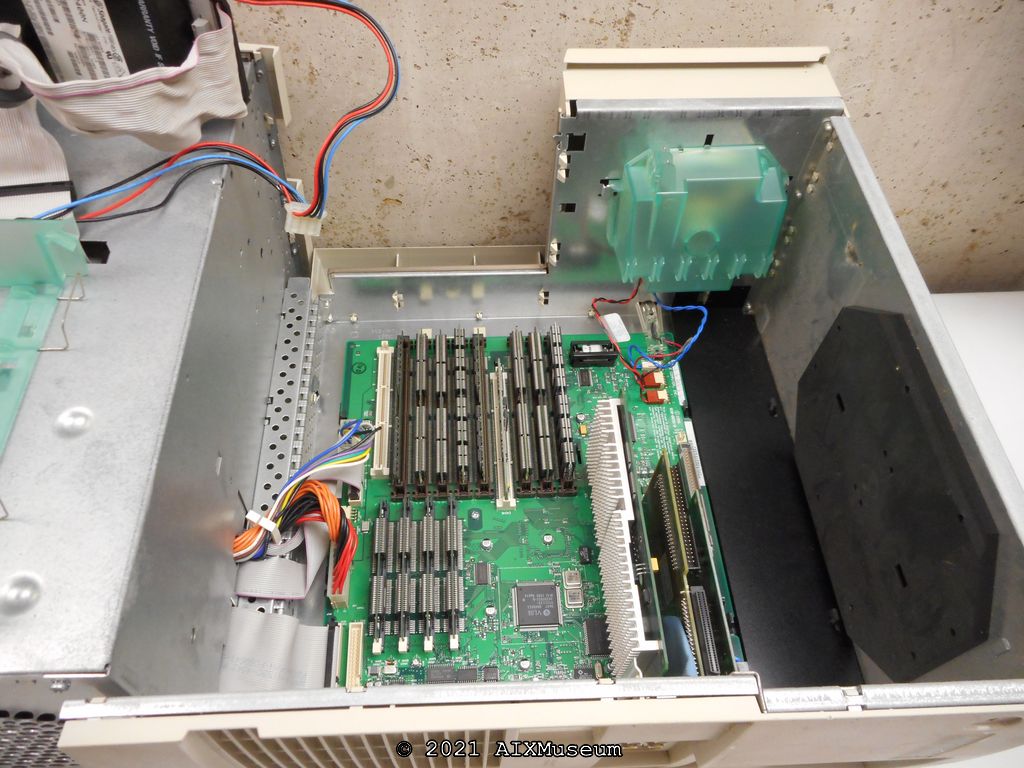
Here you can see the motherboard in all of its glory. The two white slots are for ROM modules, with just one populated. The eight brown slots are memory, with all 8 populated for 229MB of system RAM. The four small black slots with the white tabs are the video memory, with all 4 populated for 4MB of vRAM.
Also pictured from left to right are the CPU card with its large silver heatsink, the PCI SCSI card, and the PCI network card.
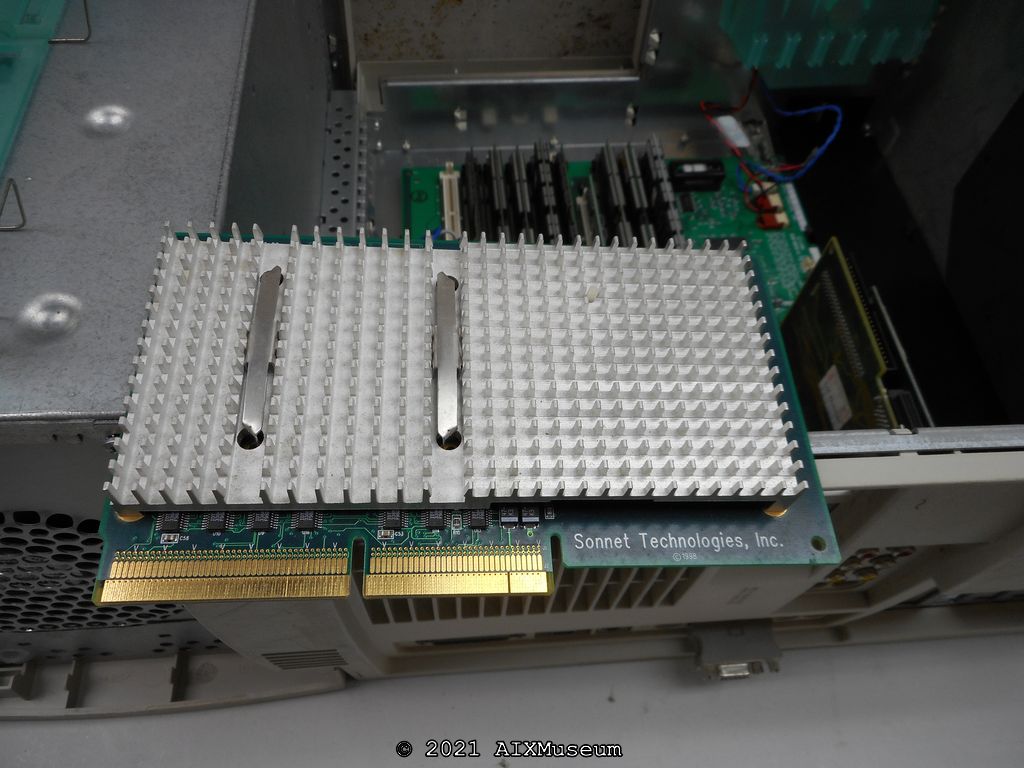
Speaking of CPU, at some point in this system’s history the CPU was upgraded from the original 200MHz PowerPC 604e to a 366 MHz G3 via a Sonnet Technologies Crescendo card. Apparently this was quite the upgrade in its day. Interestingly, and like a lot of such things there were some arguments about whether or not this upgrade was worth the money. And like all things, it seems it depends. According to EveryMac, at release the upgrade cost an eye-watering $2000 in August of 1998. It was released just 18 months after the February 1997 release of the 8600 itself, which in turn only cost $3199. For a system that Apple only had on the market for just 6 months, it was probably a compelling upgrade to extend the life of your system. However, by December of 1999, the price of a refurbished 8600 had dropped to sub-$1000, and the Sonnet card to about $400. As time went on, those prices only continued to drop.
From a technology standpoint, LowEndMac has an interesting article about the merits of the 604e vs. the G3 (which is according to the author, nothing more than a clock pumped, cache maxed 603) http://lowendmac.com/1999/how-the-g4-compares-to-the-g3/
In this case, it wasn’t just a MHz bump, but also quite a big improvement in processor architecture and technology. And in this case, was literally plug and play. Of course, a G3 is a requirement to run MacOS X, so it was a pretty popular way to breathe some life into an older system.
While setting up the 8600 for this project, I played around with MacOS 8 on the system, and it was quite fast. I’m not sure if there are any extensions that I should be loading to turn features on and off, but for the purposes of this project, it works great. It also turns out that BeOS supports the card and runs great on it!
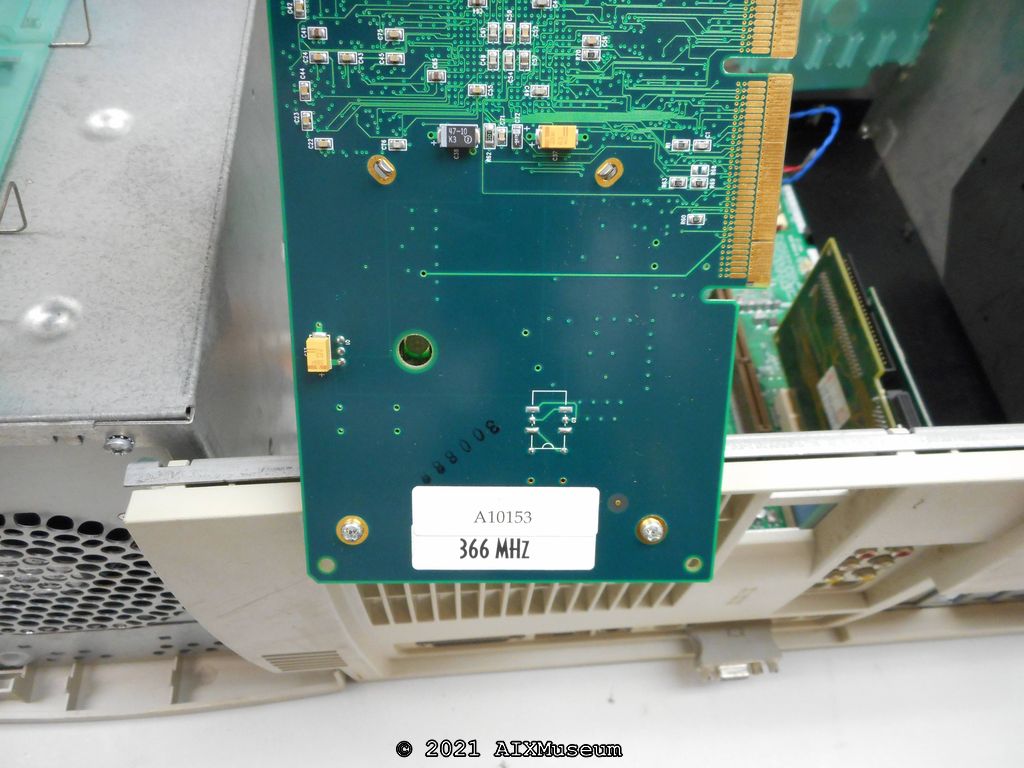
Here you can see the speed sticker. Neato.
Installing BeOS By First Installing MacOS
Now, to run BeOS we have to first run MacOS. As far as I can tell, there is no way to directly run BeOS without ‘bootstrapping’ it from MacOS.
Near as I can tell, BeOS will run under either MacOS 7 and 8. I ended up using MacOS 8.1, as that fought me the least when setting up the Mac. Ultimately the version does not seem to matter.
Insert your MacOS 8.1 CD and reboot (or power on) the system. Remember, press (and hold) the C key on the keyboard after the chime, as this will force it to boot from the CD.
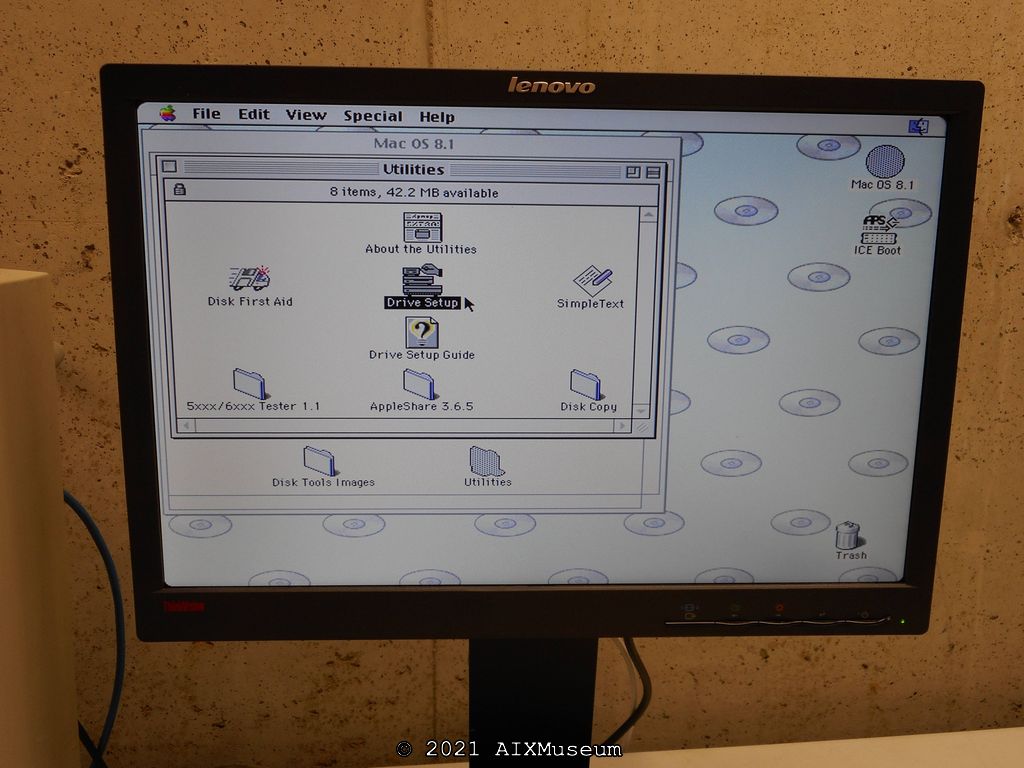
Once MacOS has started from the CD, the first thing we need to do is format that SCSI hard drive. And this can be easier said than done if you have a drive without a Mac ROM, which was somewhat common in those days. (Author note – and is especially true in 2023 with the availability of SD2SCSI adapters) Essentially you need a modified version of Drive Setup to get this done.
There are a variety of guides on the internet to help you do this. Here’s a good example: http://lowendmac.com/2007/format-any-hard-drive-for-older-macs-with-patched-apple-tools/
We have to do a custom partition setup for BeOS. From what I understand this isn’t strictly necessary, and definitely isn’t if you are installing BeOS to a 2nd hard drive. The BeOS installer is supposed to be able to repartition a MacOS installed hard drive, but I never had any luck with it.
So in this case, we’ll create a small 512MB MacOS partition, and leave the rest unpartitioned for BeOS to use later.

Here you can see that I created one 512MB partition at the beginning of the drive that we will use for the installation and running of MacOS. The remaining 2007MB we will not partition at all.
Initialize the new volume, and the drive setup is complete. Exit Drive Setup.
Double-click on the ‘Install MacOS 8.1’ and the installer will begin. I’ll leave the installation of MacOS up to you. I chose a very minimal install – as I won’t be using this system for MacOS other than to bootstrap into BeOS.
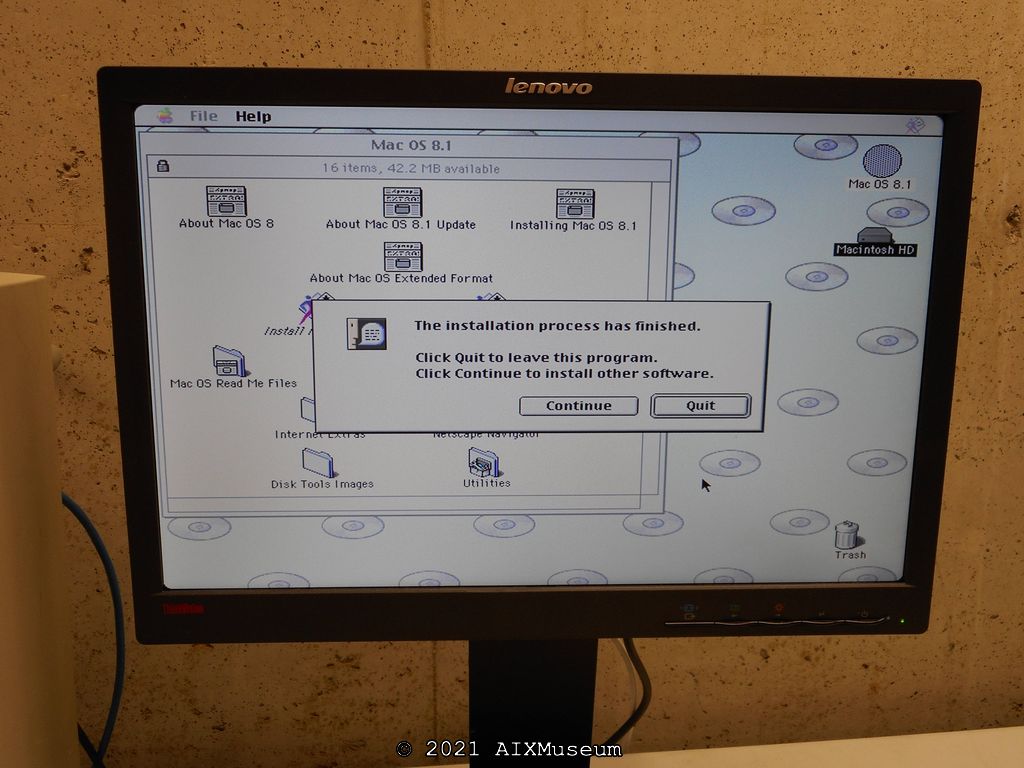
Great! MacOS is now installed. Quit and reboot the system, to let it boot from the internal hard drive.
Complete the usual MacOS first-boot settings adjustment. Energy saver, Setup Assistant, change display resolution, etc. Ultimately we will not use MacOS on this system, so the settings don’t matter very much.
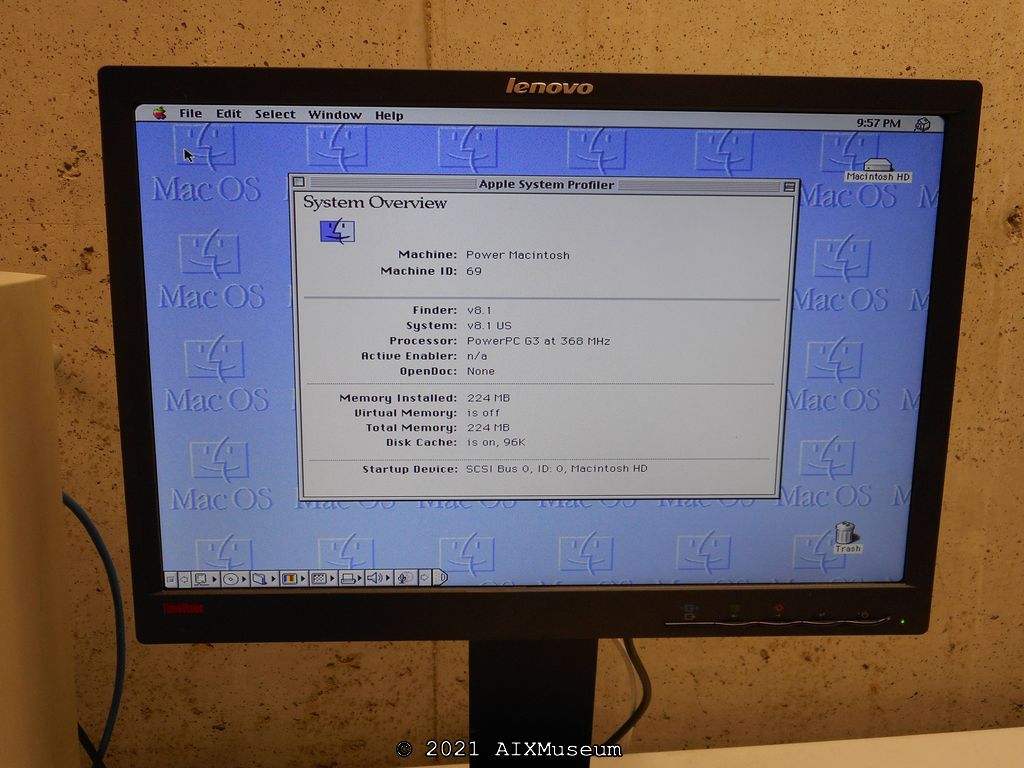
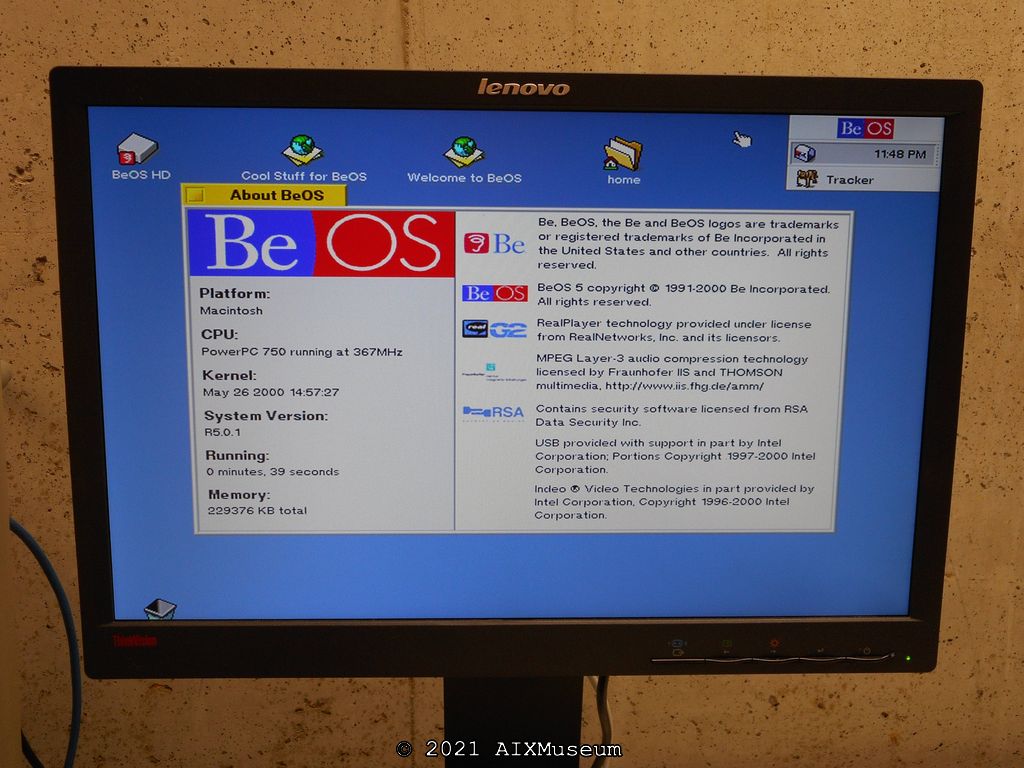
Here’s the system overview. Lots of memory! And you can see the PowerPC G3 366MHz processor. Neato.
Onward to BeOS!
Installing BeOS R5 Pro
I decided on BeOS R5 Pro, specifically vR5.01. (Author’s Note – At the time, I didn’t realize that R5.03 was available!) Released in 2000, this was the last version available for PowerPC. I chose the Pro version, as at this version has the most fun stuff included.
You can find the ISO in the usual places on the Internet. Burn a copy of the disc and insert it into the Mac.
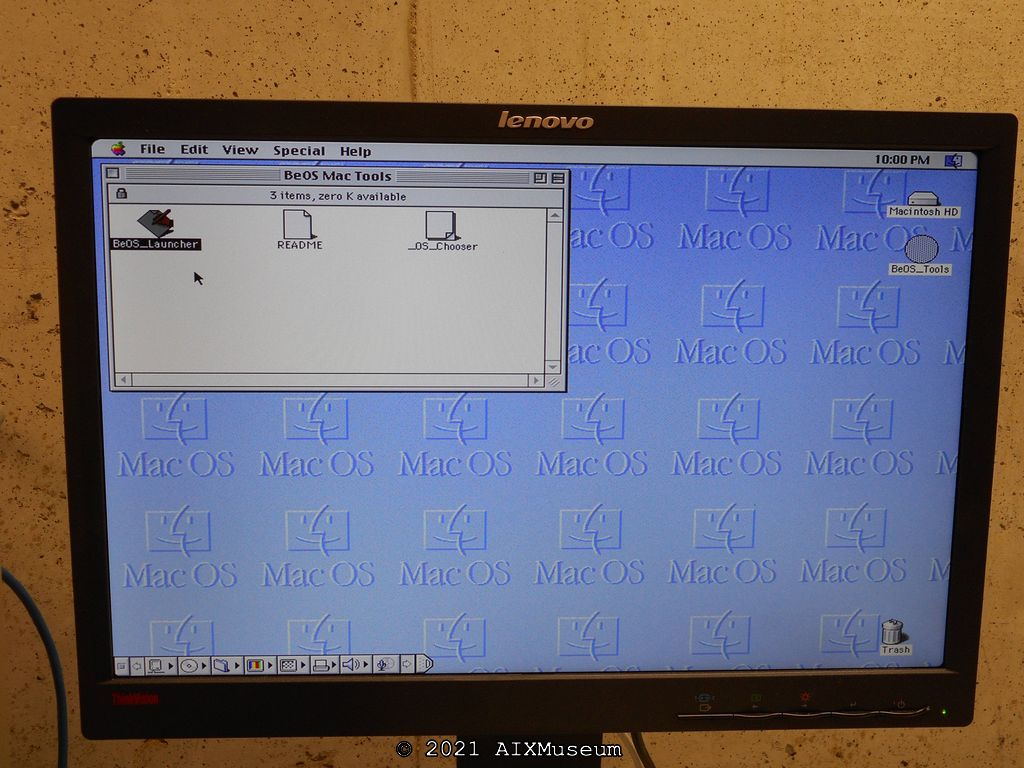
Once the CD is mounted, open the ‘Macintosh’ folder, then the ‘BeOS Mac Tools’ folder, and then run the ‘BeOS_Launcher’ application.
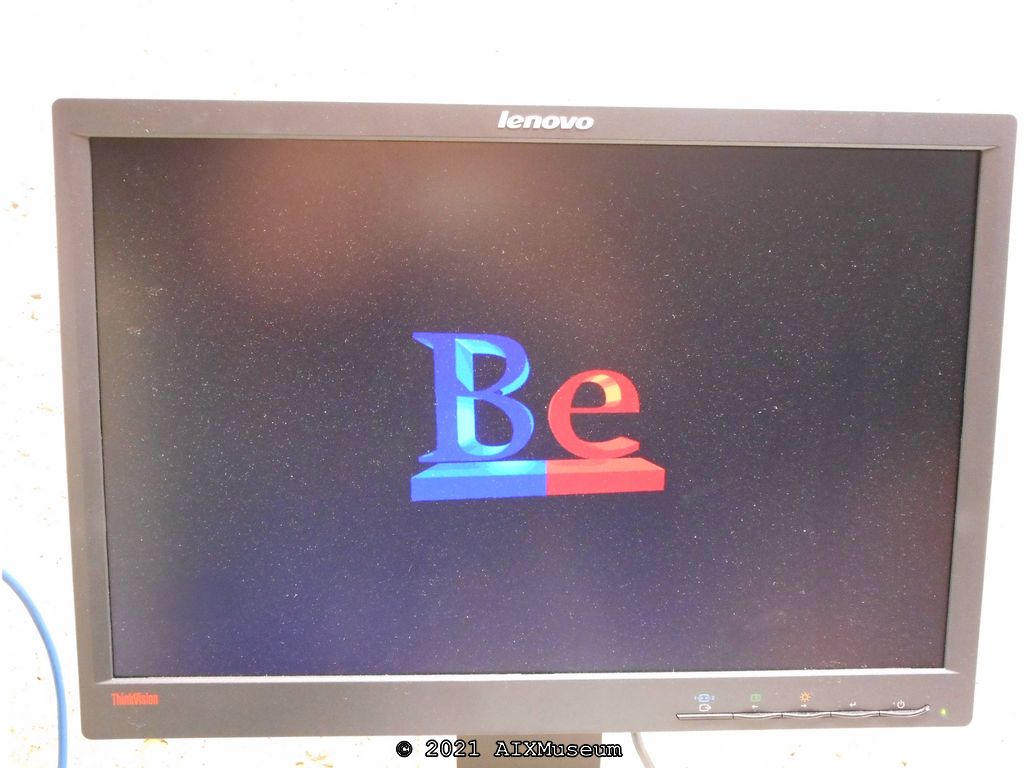
The system will churn for a bit, and then the screen will blank out, and you’ll be given the ‘Be’ logo as it starts the installer.
The first thing it does is display the license agreement. Click Agree.
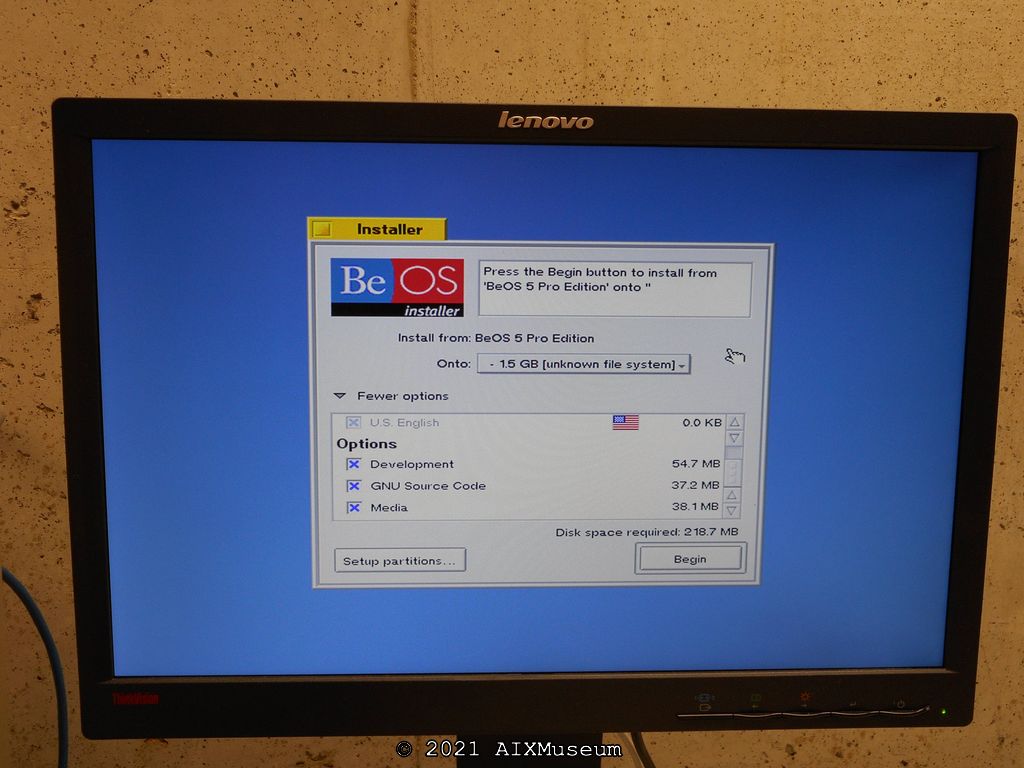
Next, the Installer window will appear. Use the drop down and select the ‘1.5 GB Unknown’ filesystem (which is our unpartitioned space we reserved earlier). I also clicked the ‘More Options’ box at this point to install some optional extras, of which I clicked all. We have the space, so why not. When you’re ready to install, click the ‘Begin’ button.
The installer will ask if you are sure you want to initialize the partition. Click ‘Initialize’.
Next, you name the new volume. I chose ‘BeOS HD’ to mimic the ‘Macintosh HD’ naming style.
Finally it will ask you to confirm. Click Yes, and the installer begins its work.

Once the disk has been initialized, it will start the install. This is quite fast, taking only about 5 minutes.
When complete, the installer will ask you if you want to quit/restart. I chose yes, and the system then restarted, booting back into MacOS.
Now, what you’ll notice is that the system doesn’t boot immediately into BeOS. Instead you’ll get back into MacOS. This is by design, actually. What we have to do is load a MacOS extension to allow us to choose the OS we want to boot.
If you haven’t already, insert the CD again, and open up the BeOS Mac Tools folder. Look for the “_OS_Chooser” extension.
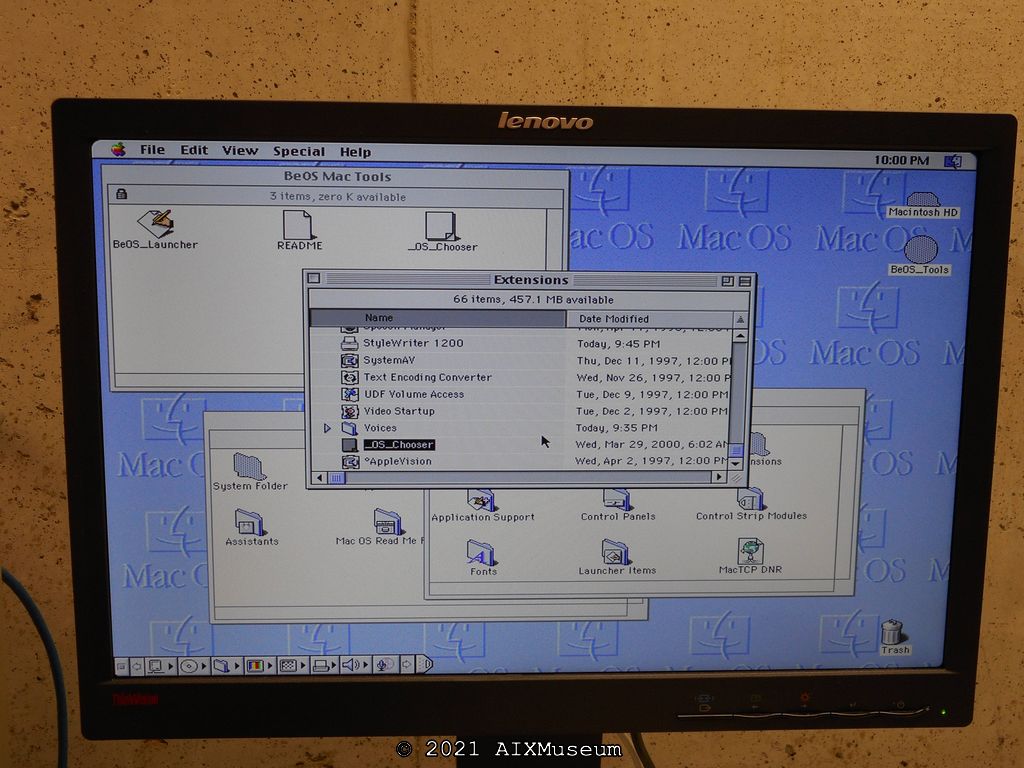
Copy that extension to your System Folder’s Extensions folder. Reboot the system.
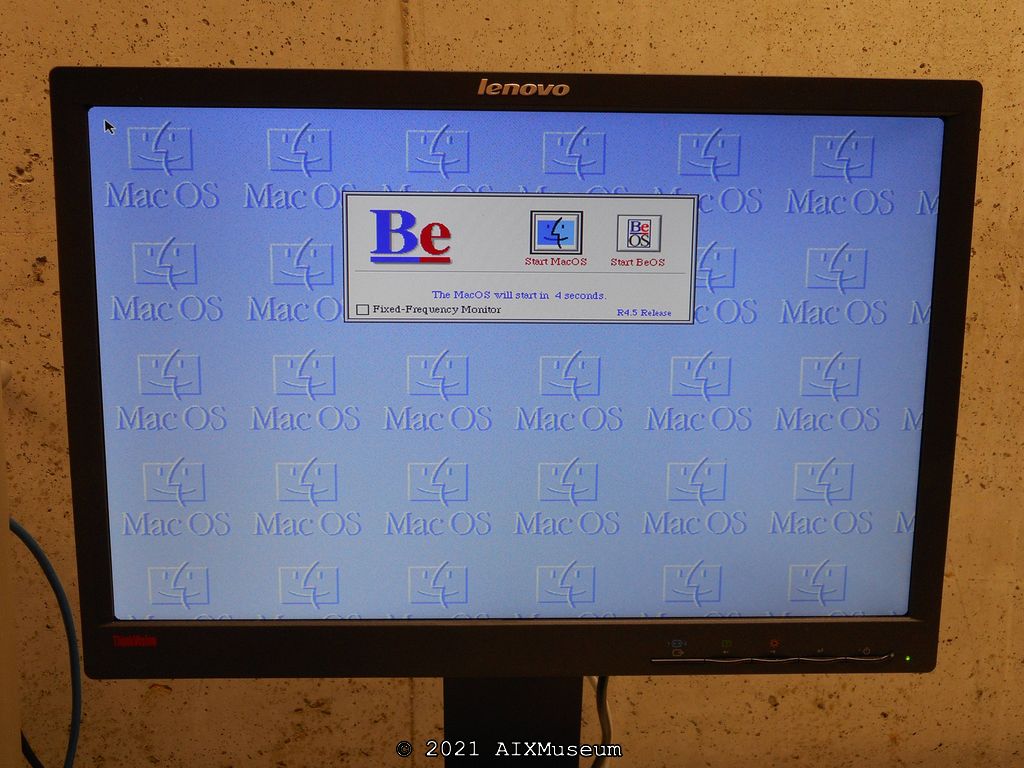
Now you’ll see the extension load first (which is why it has the _ at the beginning of its name) and will give you this OS chooser. It will boot the last OS, in this case MacOS, and give you a 5 second timeout. Click on ‘Start BeOS’. The next time you restart the system, it should remember the BeOS choice.
Again, you’ll see the Be logo as it starts up.
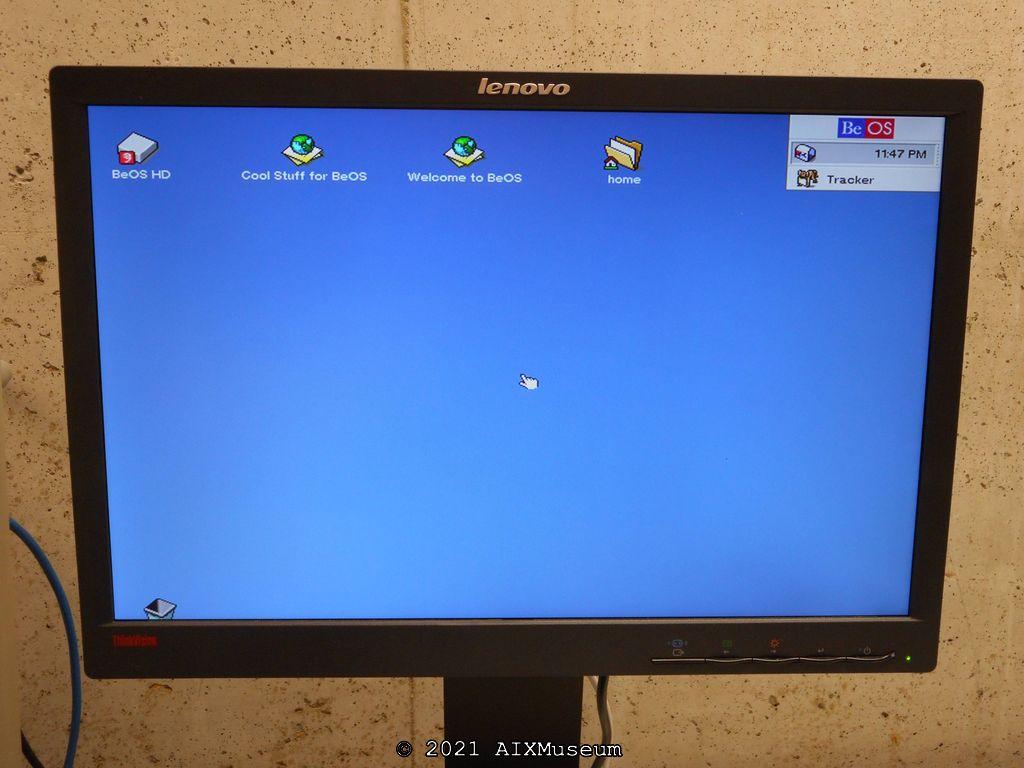
And then you’ll get the BeOS desktop. The interface is rather intuitive and pretty consistent with modern point-and-click OS’s. Click the ‘BeOS’ icon to get a drop down ‘Start’ style menu. Easy-peasy.
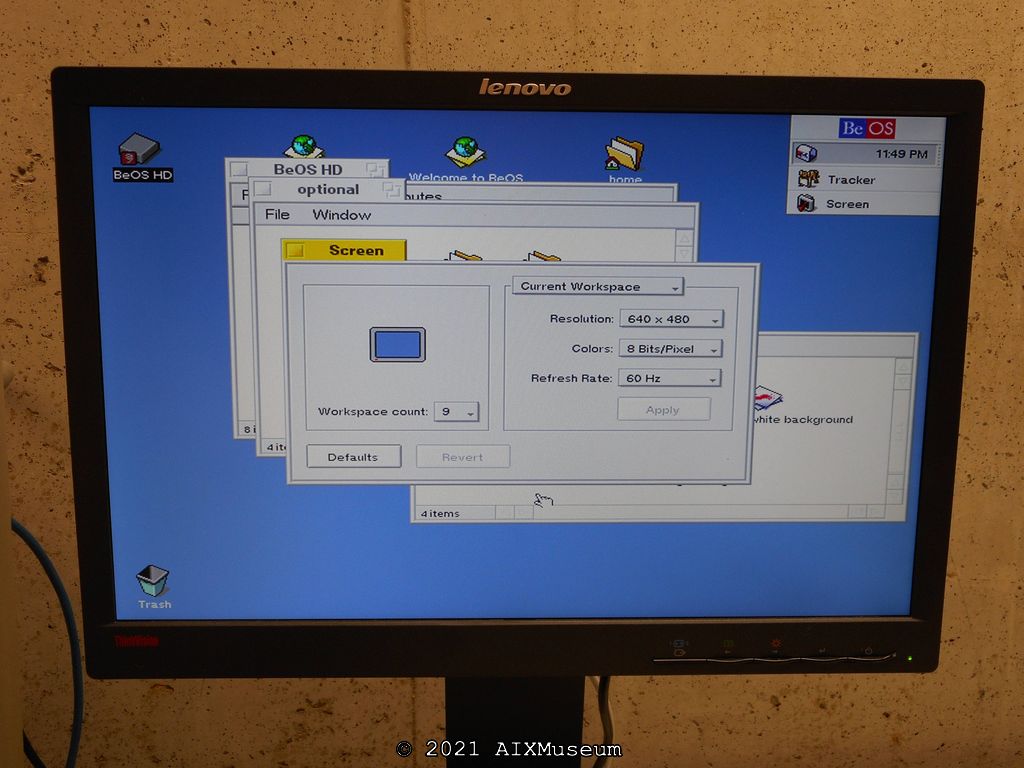
First things first, once again, we’re gonna go for a higher screen resolution. 640×480 is the default. I was able to adjust it to 1024×768 with a 60Hz refresh rate.
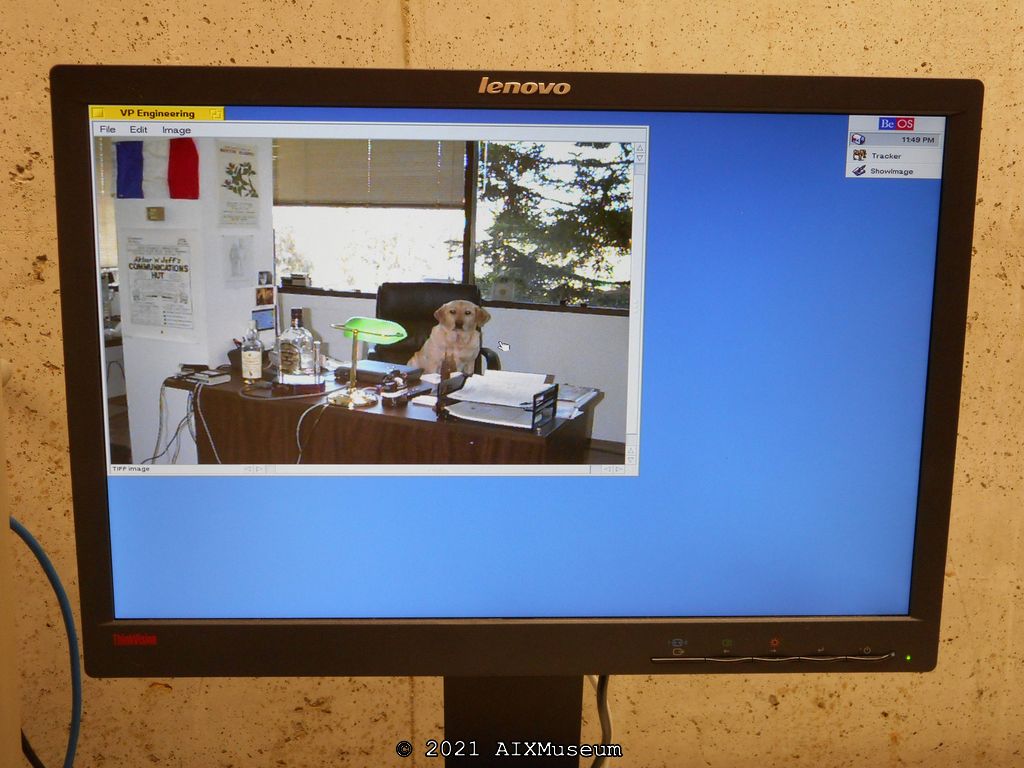
There were some sample media files on the system. This one was titled ‘VP Engineering”. Nice.
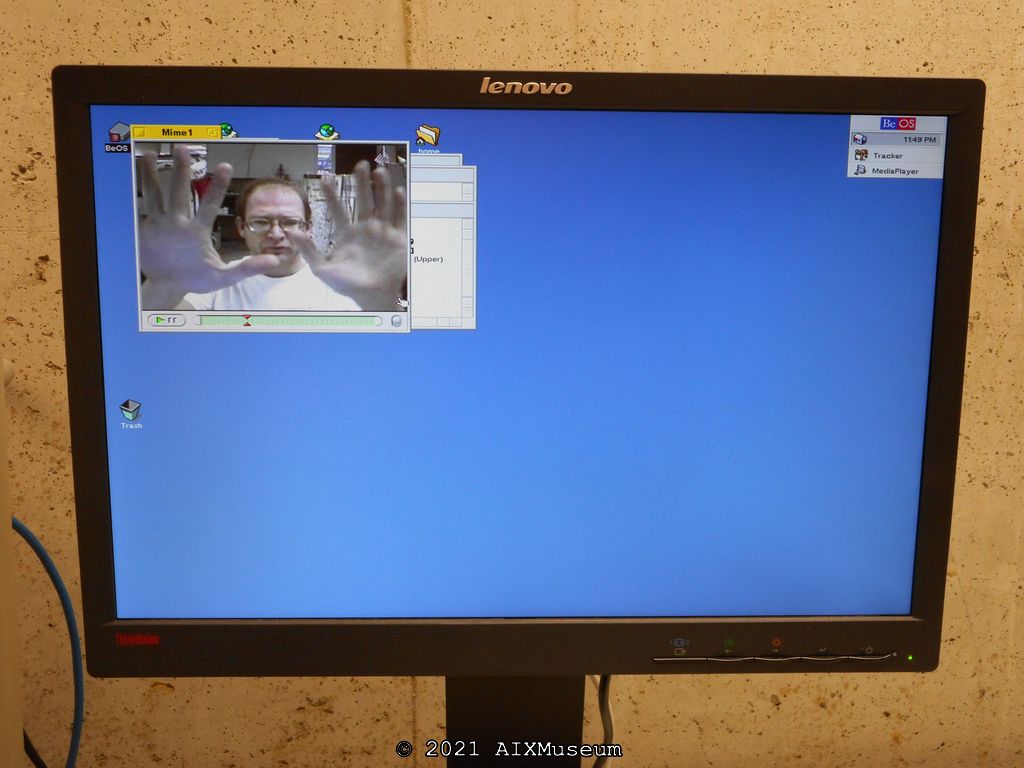
There was an included video file, this one titled ‘Mime1’ of a man acting out the traditional ‘Traped in a Box’ mime act. Kind of impressive video quality considering what kind of video capture they had for what appears to just be a workstation’s webcam laying around in those days.
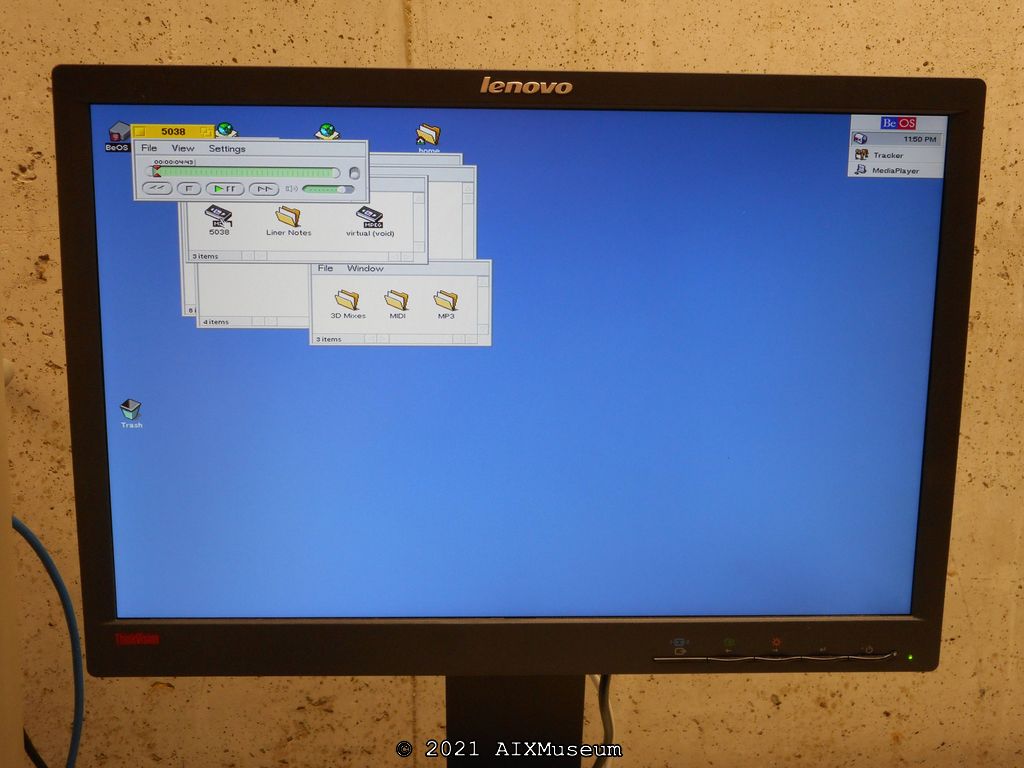
The built-in media player, playing one of the included MP3’s. A radical thing for the time. The internal speaker of the Macintosh does pretty well playing the music, and can get to a decent volume.
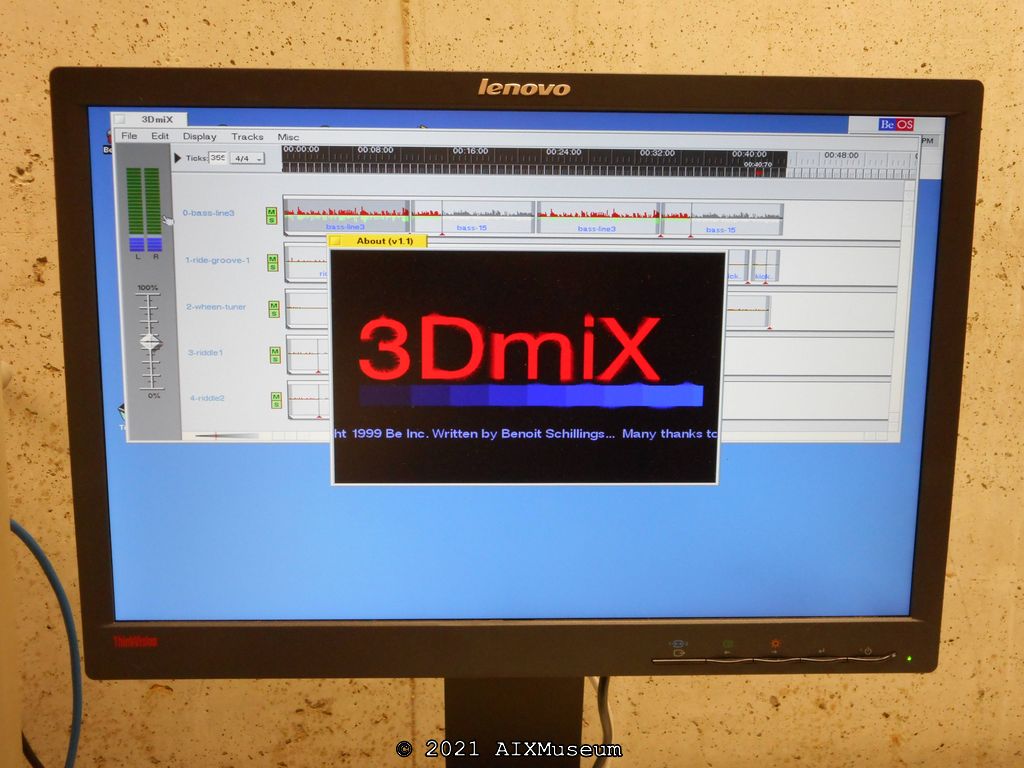
Also included was the 3DmiX program. It’s a kind of audio-mixer / multi-track audio thing. I didn’t play around with it too much, but what I did was pretty neat. Apparently this was considered really ‘cool’ at the time. https://en.wikipedia.org/wiki/3dmiX
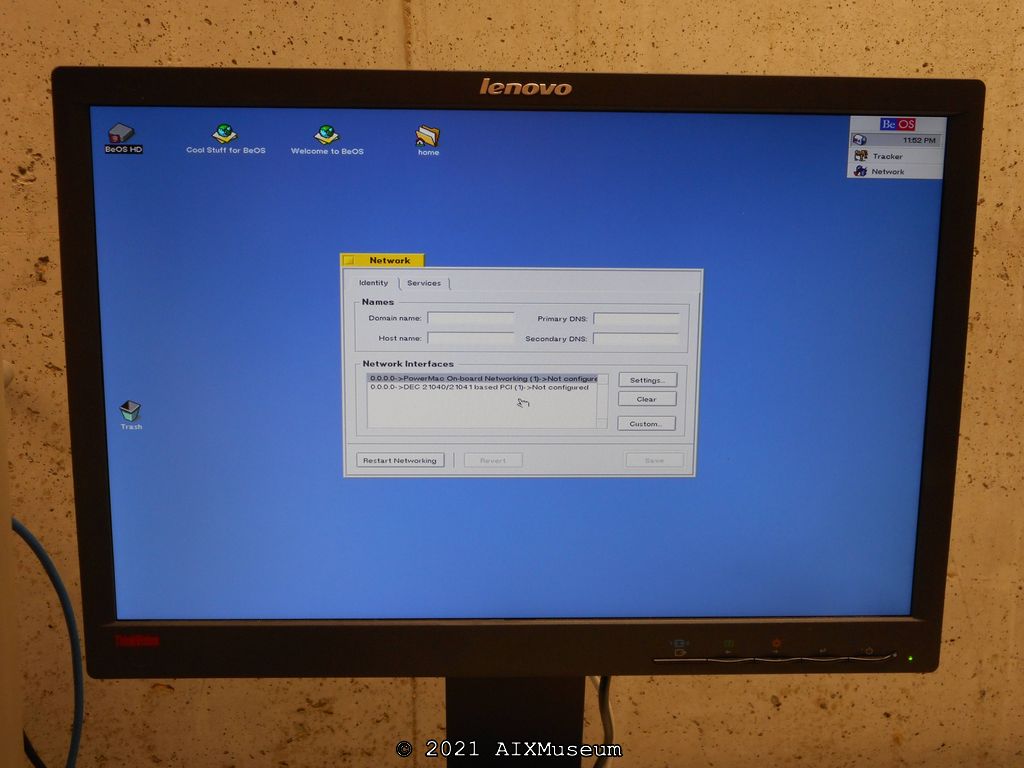
Configuring networking is relatively straightforward. Anyone who’s configured networking in a contemporary OS of the time will understand the setup. Launch the Networking control panel. Choose built-in networking, and click the ‘Settings’ button. Choose your desired network interface (I tried using the PCI network card, but it never quite worked correctly) and set the configuration for DHCP. Restart networking to apply the changes, and it “just works”.
Also, turn on both the FTP and Telnet servers, so that we can access the system over the network.
Connecting to the system via telnet is interesting – it is *almost* UNIX, but not quite. It’s *almost* Windows, but not quite. If you’re familiar with CLIs, you can get around, but you’ll quickly find a lot of expected tools are missing. Grep, for example.

Once I had networking working, and had enabled the FTP server, I was able to transfer over files. Transfers were pretty fast for the system. On the built-in 10Mb Ethernet, and onto that slow SCSI drive, I was getting 1-2MB a second.
I used an FTP client on a Windows PC and transferred over this picture, which you can then set as a background rather easily through the display settings control panel. Looks pretty good, I’d say.
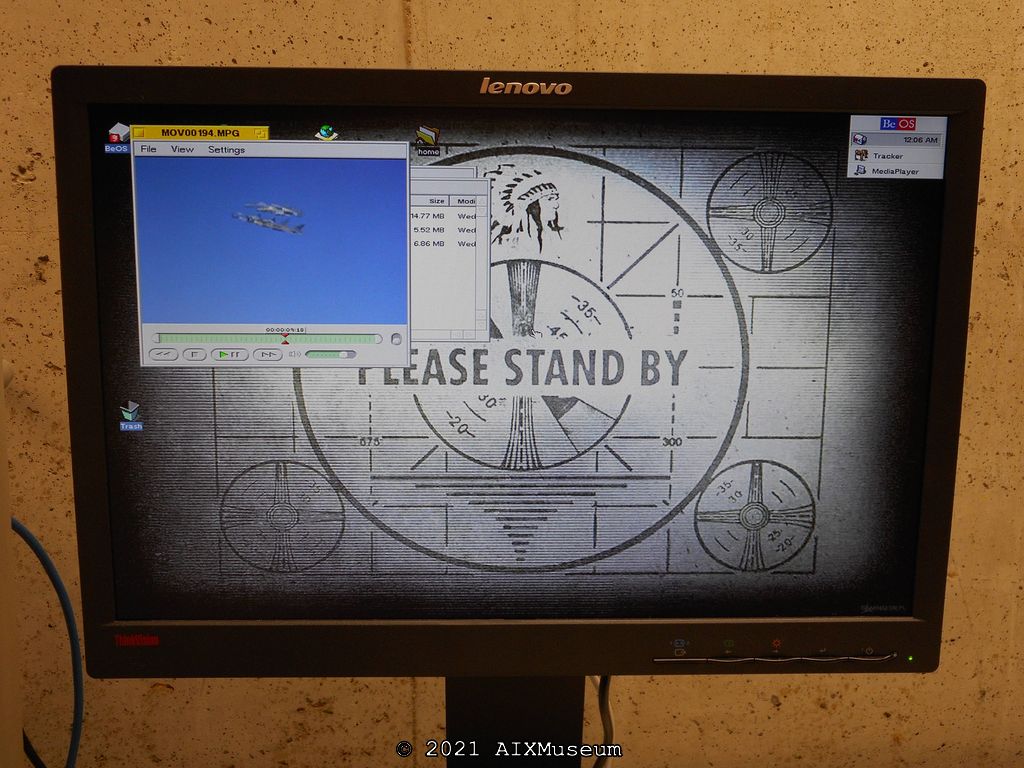
Here, I tried playing around with the media player on the system. Playing a straight MPEG video taken from an old Sony digital camera plays quite well. I believe that is an Thunderbolt A10 doing a low-speed flyby from a local airshow in the screenshot, but the picture doesn’t do it any justice. Playback worked great.
The built-in video player had no idea how to play .WMV files, unsurprisingly. It complained of a DIVX codec compatibility issue. Another problem from a bygone era I’d rather never deal with again.
I found that modern MP3 files would play, but only a few minutes worth. For example, a 5 minute MP3 would only play about 4 minutes. Perhaps a memory thing? However, low bitrate MP3s worked great.
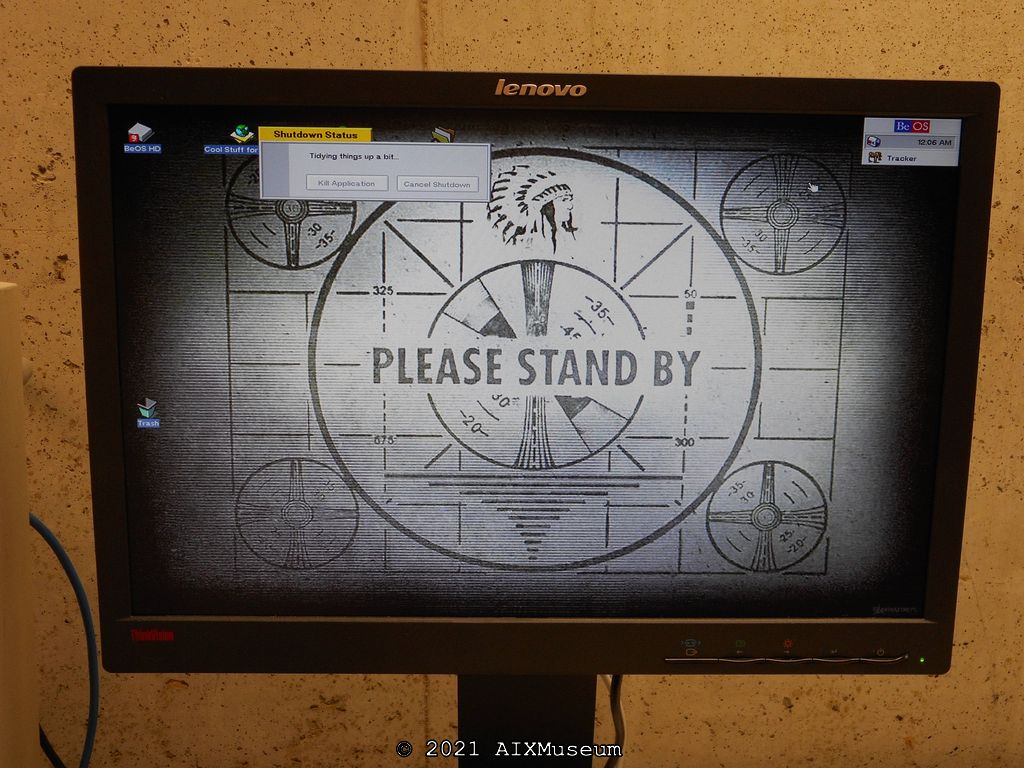
Finally, when we’re all done, and you shut down the system, it displays this message, and then powers off the system entirely.
And that’s it! Thanks for looking!